Getting Started
This guide takes you from an empty account to your first running agent in three steps:
- Create your account (or log in)
- Connect an exchange
- Create your first agent
1. Create your account
Log into your Bilo account, or complete the registration form on the Bilo homepage. After registering, verify your email address, then sign in — you'll land on an empty workspace, ready to set up.
2. Connect an exchange
Your agents trade through your own exchange account using API keys — Bilo never holds your funds. So before you can create an agent, you need to connect an exchange.
Open the Exchanges page. On a new account it's empty, with a short checklist of what you'll need:
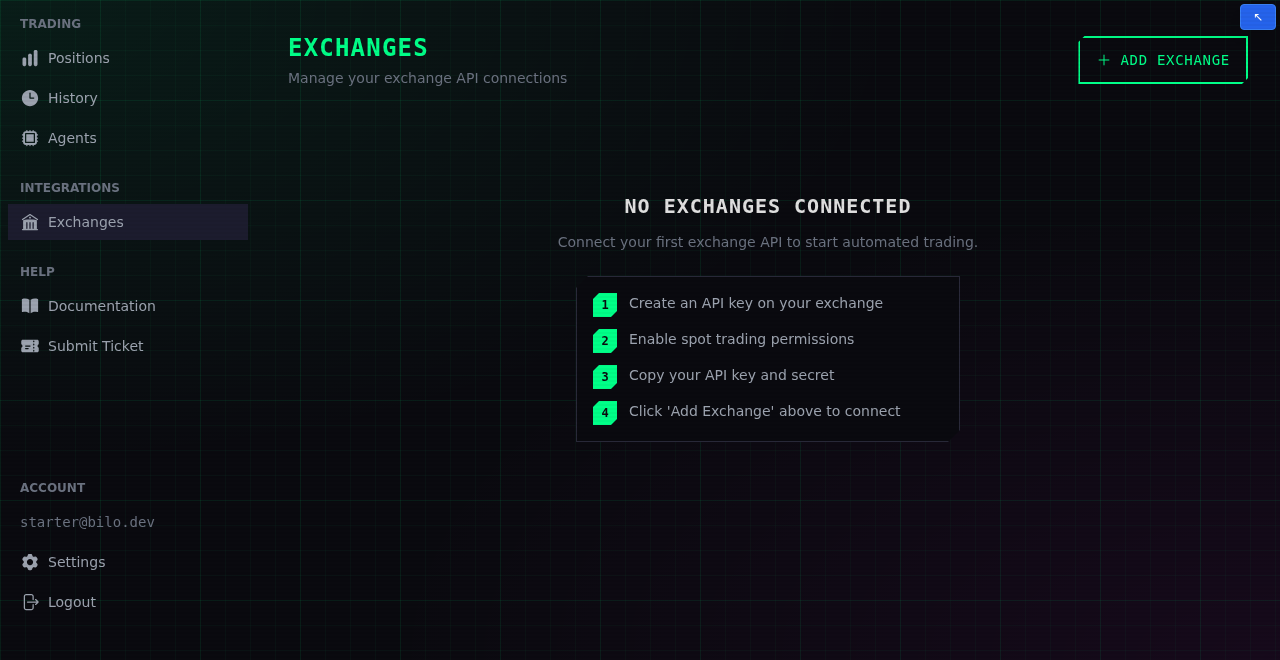
Click Add Exchange and fill in the form:
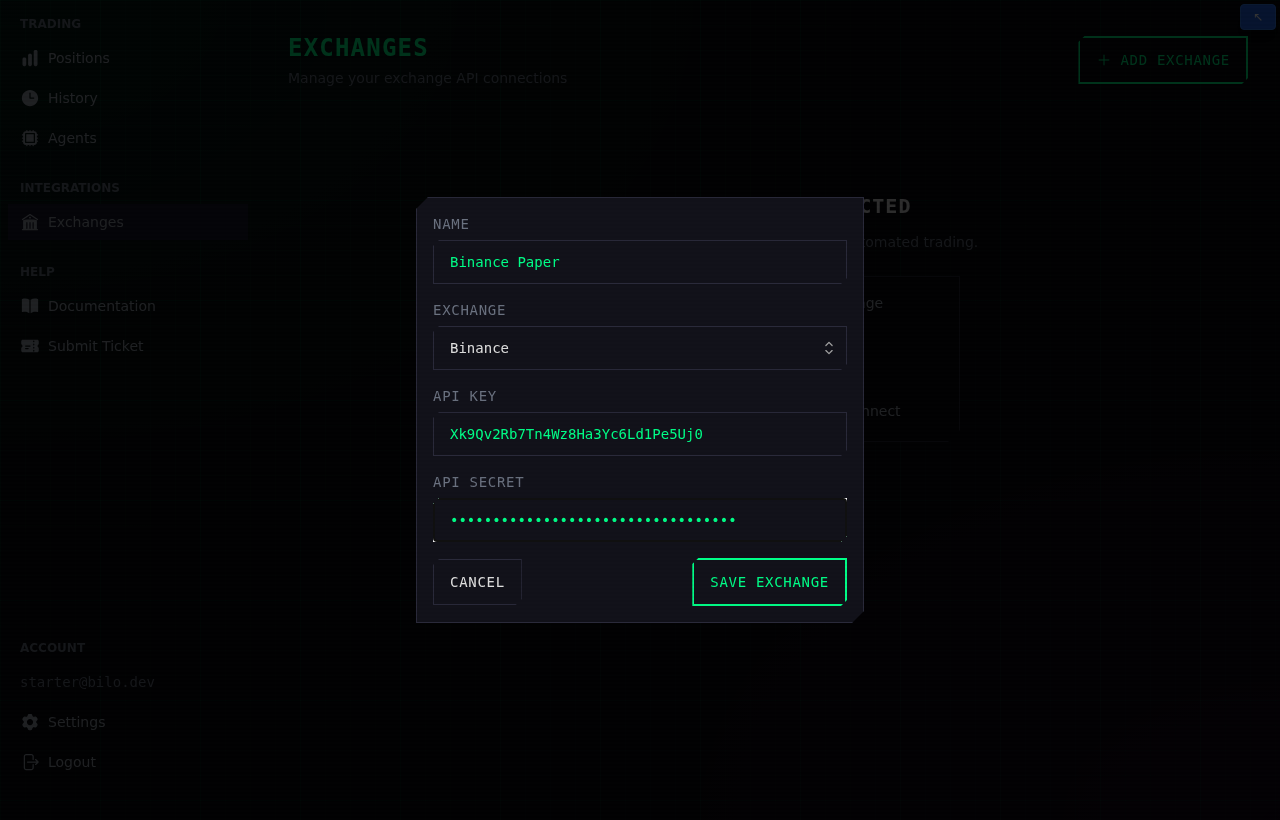
- Name — any label you like, e.g. Binance Paper. It's just how the exchange appears in your agent list.
- Exchange — select Binance, OKX or Bybit.
- API Key and API Secret — paste the keys from your exchange.
- Passphrase — OKX only: the passphrase you chose when creating the key.
To create your API keys: on Binance, follow this guide; on OKX, use the API management page; on Bybit, use the API management page. Make sure the trading permission (Spot Trading on Binance, Trade on OKX and Bybit) is enabled and, if you restrict by IP, that all IPs are accepted.
Just exploring? A paper-trading agent never sends real orders, so you can connect with placeholder keys purely to try Bilo out. When you're ready to trade real funds, add an exchange with real keys that have Spot Trading enabled.
Press Save Exchange. Your exchange now shows as Connected:
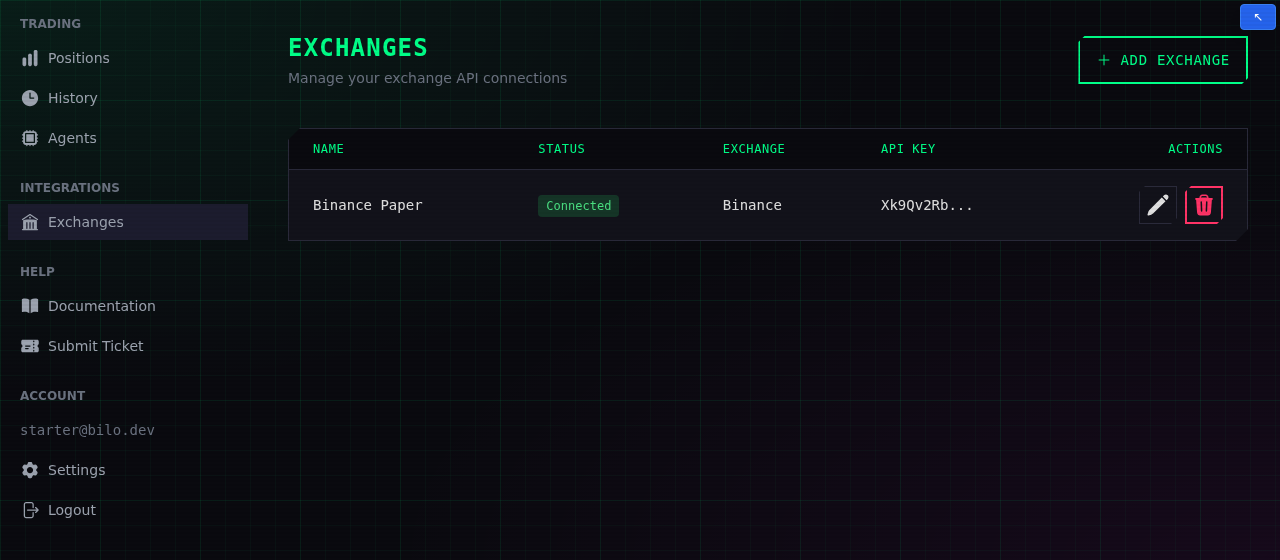
You can add more exchanges, or edit and remove them, from this page at any time.
3. Create your first agent
Open the Agents page. With an exchange connected but no agents yet, it walks you through what's next:
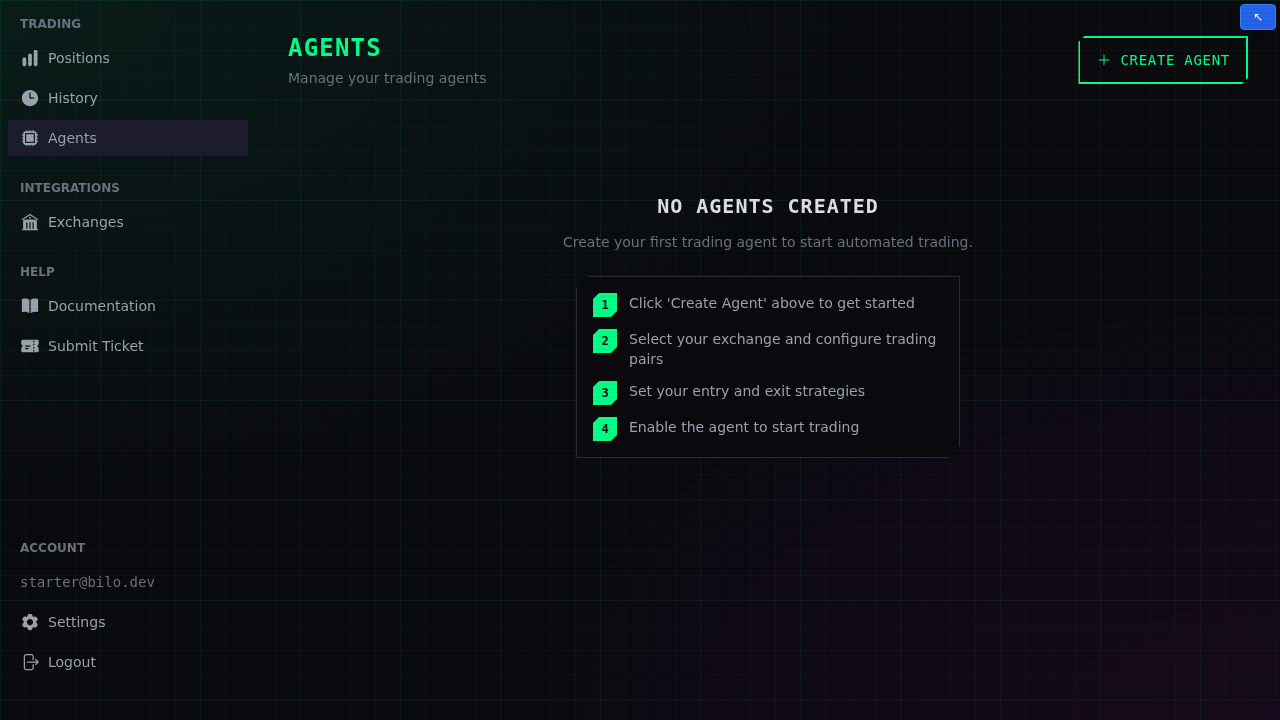
Click Create Agent to open the configuration form. To start safely, leave Paper Trading Mode turned on — the agent will trade with simulated funds so you can watch your strategy work without risking anything.
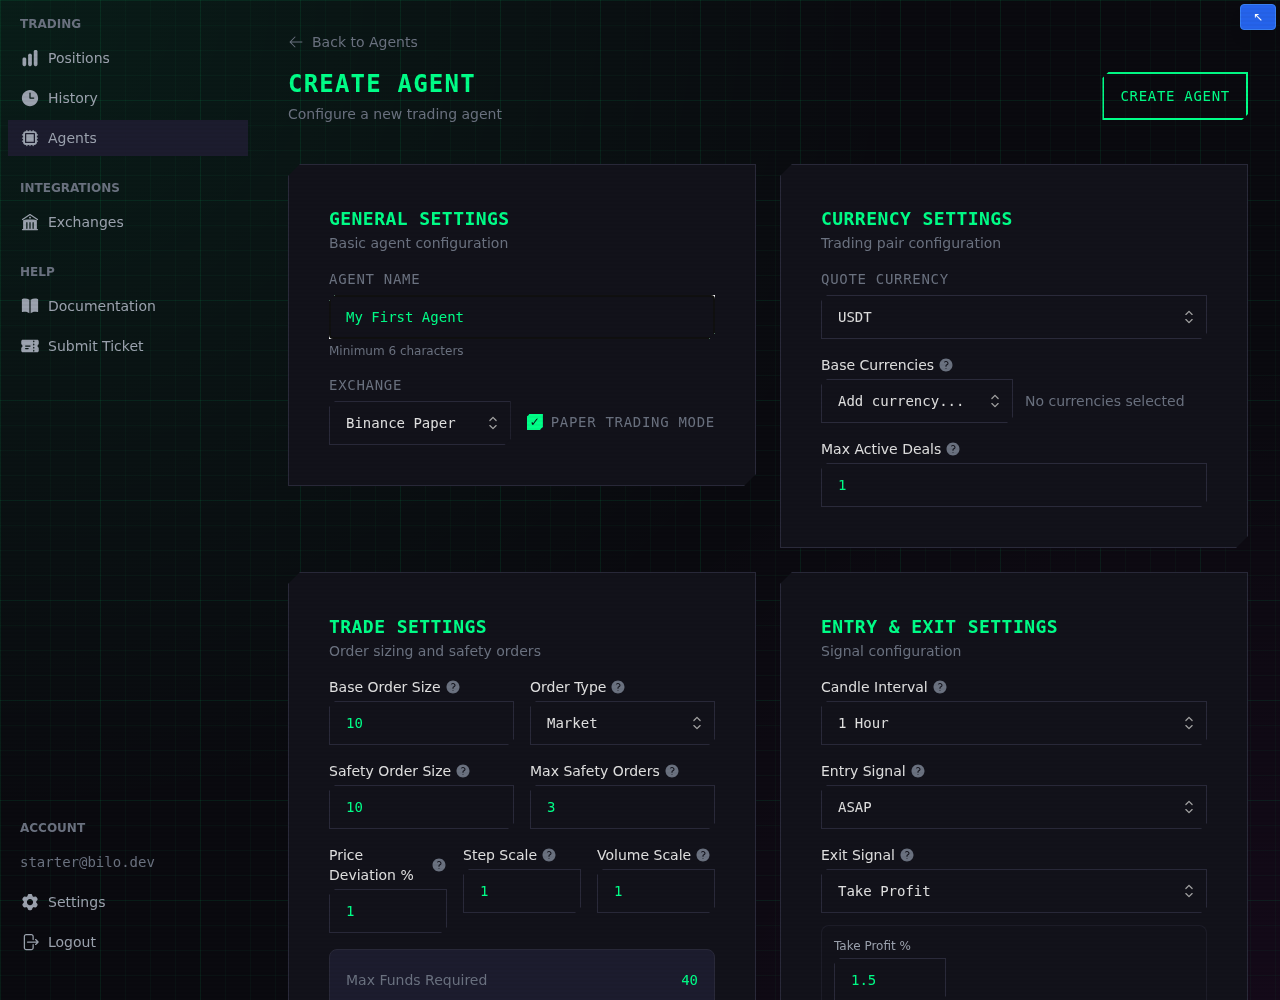
At a minimum, to get going:
- General Settings — give the agent a Name (6 to 50 characters), pick your Exchange, and keep Paper Trading Mode on.
- Currency Settings — choose a Quote Currency (e.g. USDT) and add the Base Currencies (trading pairs) it may trade.
- Trade and Entry & Exit Settings — set your order sizes and the signals that open and close deals.
Every field on this form is explained in detail in Bot Settings, and the available entry/exit strategies are covered in Signals. When you're happy, press Create Agent.
What's next
- Turn it on. Back on the Agents page, flip the agent's toggle to start it. See Managing Your Agents to watch its deals, positions, and profit.
- Test before going live. On a Pro plan you can replay a paper agent over historical data first — see Backtesting.
- Go deeper. Read Bot Settings to fine-tune every parameter.